Story Generation
Story generation uses AI to produce narratives explaining how specific code came to be. By clicking any line number in the code browser, TraceVault analyzes the commit history and linked AI sessions to tell the story of that code — its purpose, evolution, and the decisions behind it.
Why It Matters
Understanding code provenance goes beyond git blame. A line-level annotation shows who changed a line and when, but not why or how. Story generation bridges that gap by correlating commits with recorded AI sessions, producing a readable narrative that explains the intent, evolution, and key decisions behind a function or code block.
This is especially valuable during code reviews, onboarding, and audits — situations where understanding context matters as much as reading the code itself.
Prerequisites
Story generation requires an LLM provider to be configured in your organization's settings. Navigate to Settings > LLM to set up:
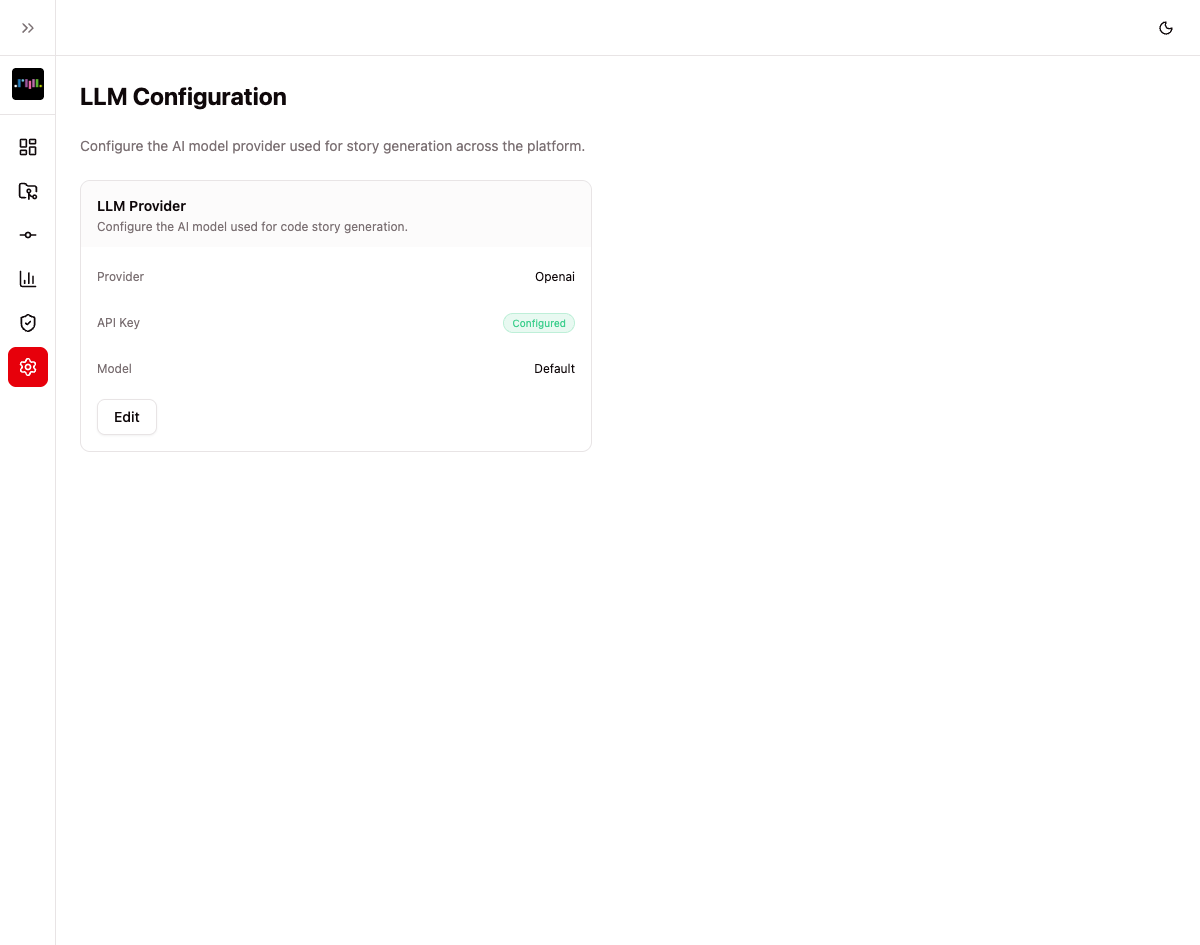
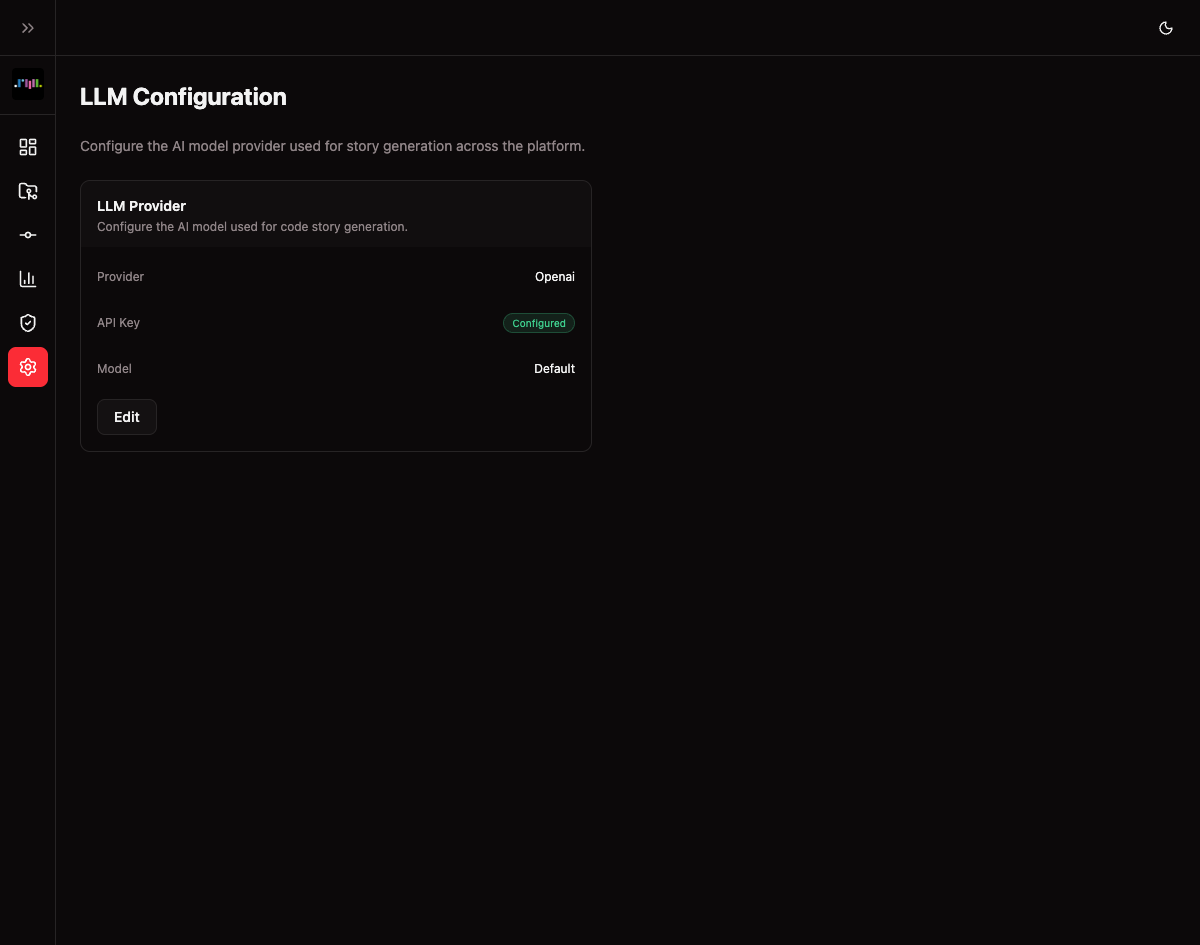
- Provider — Choose between Anthropic or OpenAI
- API Key — Your provider's API key (stored securely, shown only as "Configured" or "Not set")
- Model — A specific model to use, or leave blank for the provider's default
- Base URL — Optional custom endpoint for self-hosted or proxy deployments
Only owners and admins can configure LLM settings. Without a configured provider, clicking a line number will display a message directing you to the settings page.
How It Works
Step 1: Browse to a File
From a repository's detail page, click Browse Code to open the code browser. Navigate the file tree or use the branch/tag selector to find the file you want to explore.
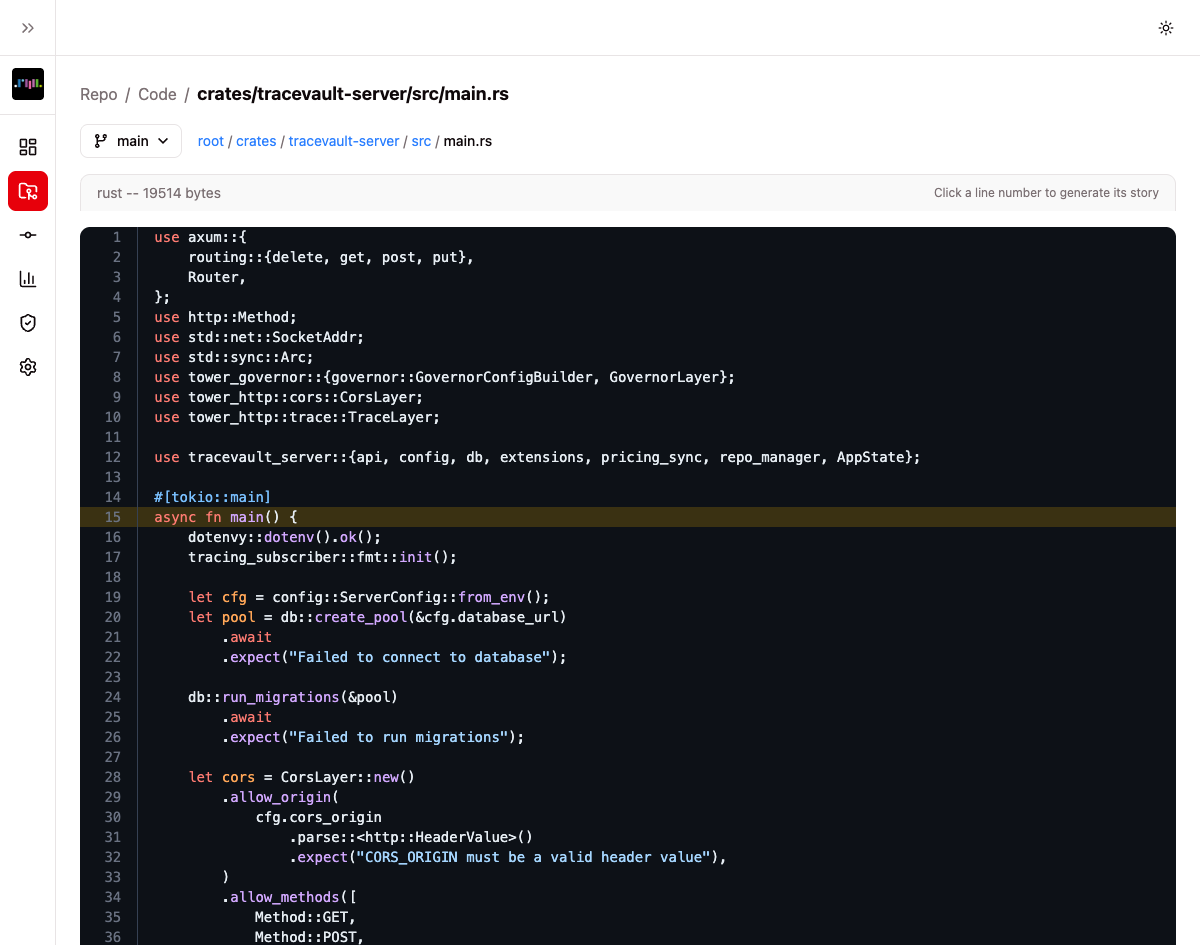
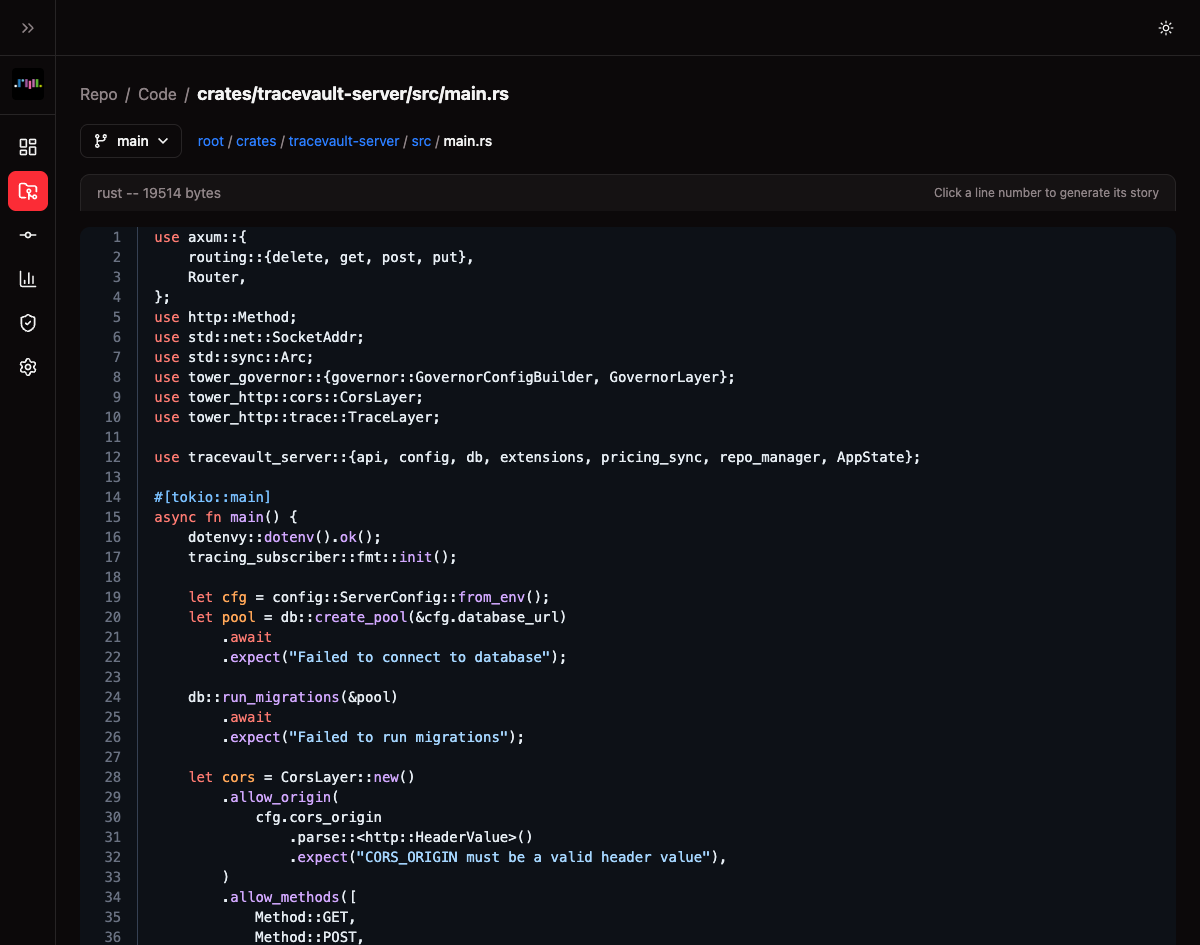
Files are displayed with syntax highlighting and line numbers. A hint at the top right reads "Click a line number to generate its story."
Step 2: Click a Line Number
Click any line number in the file view. TraceVault will:
- Identify the function or code block containing that line
- Gather all commits that touched those lines
- Find AI sessions linked to those commits
- Send the context to the configured LLM provider
- Return a structured narrative
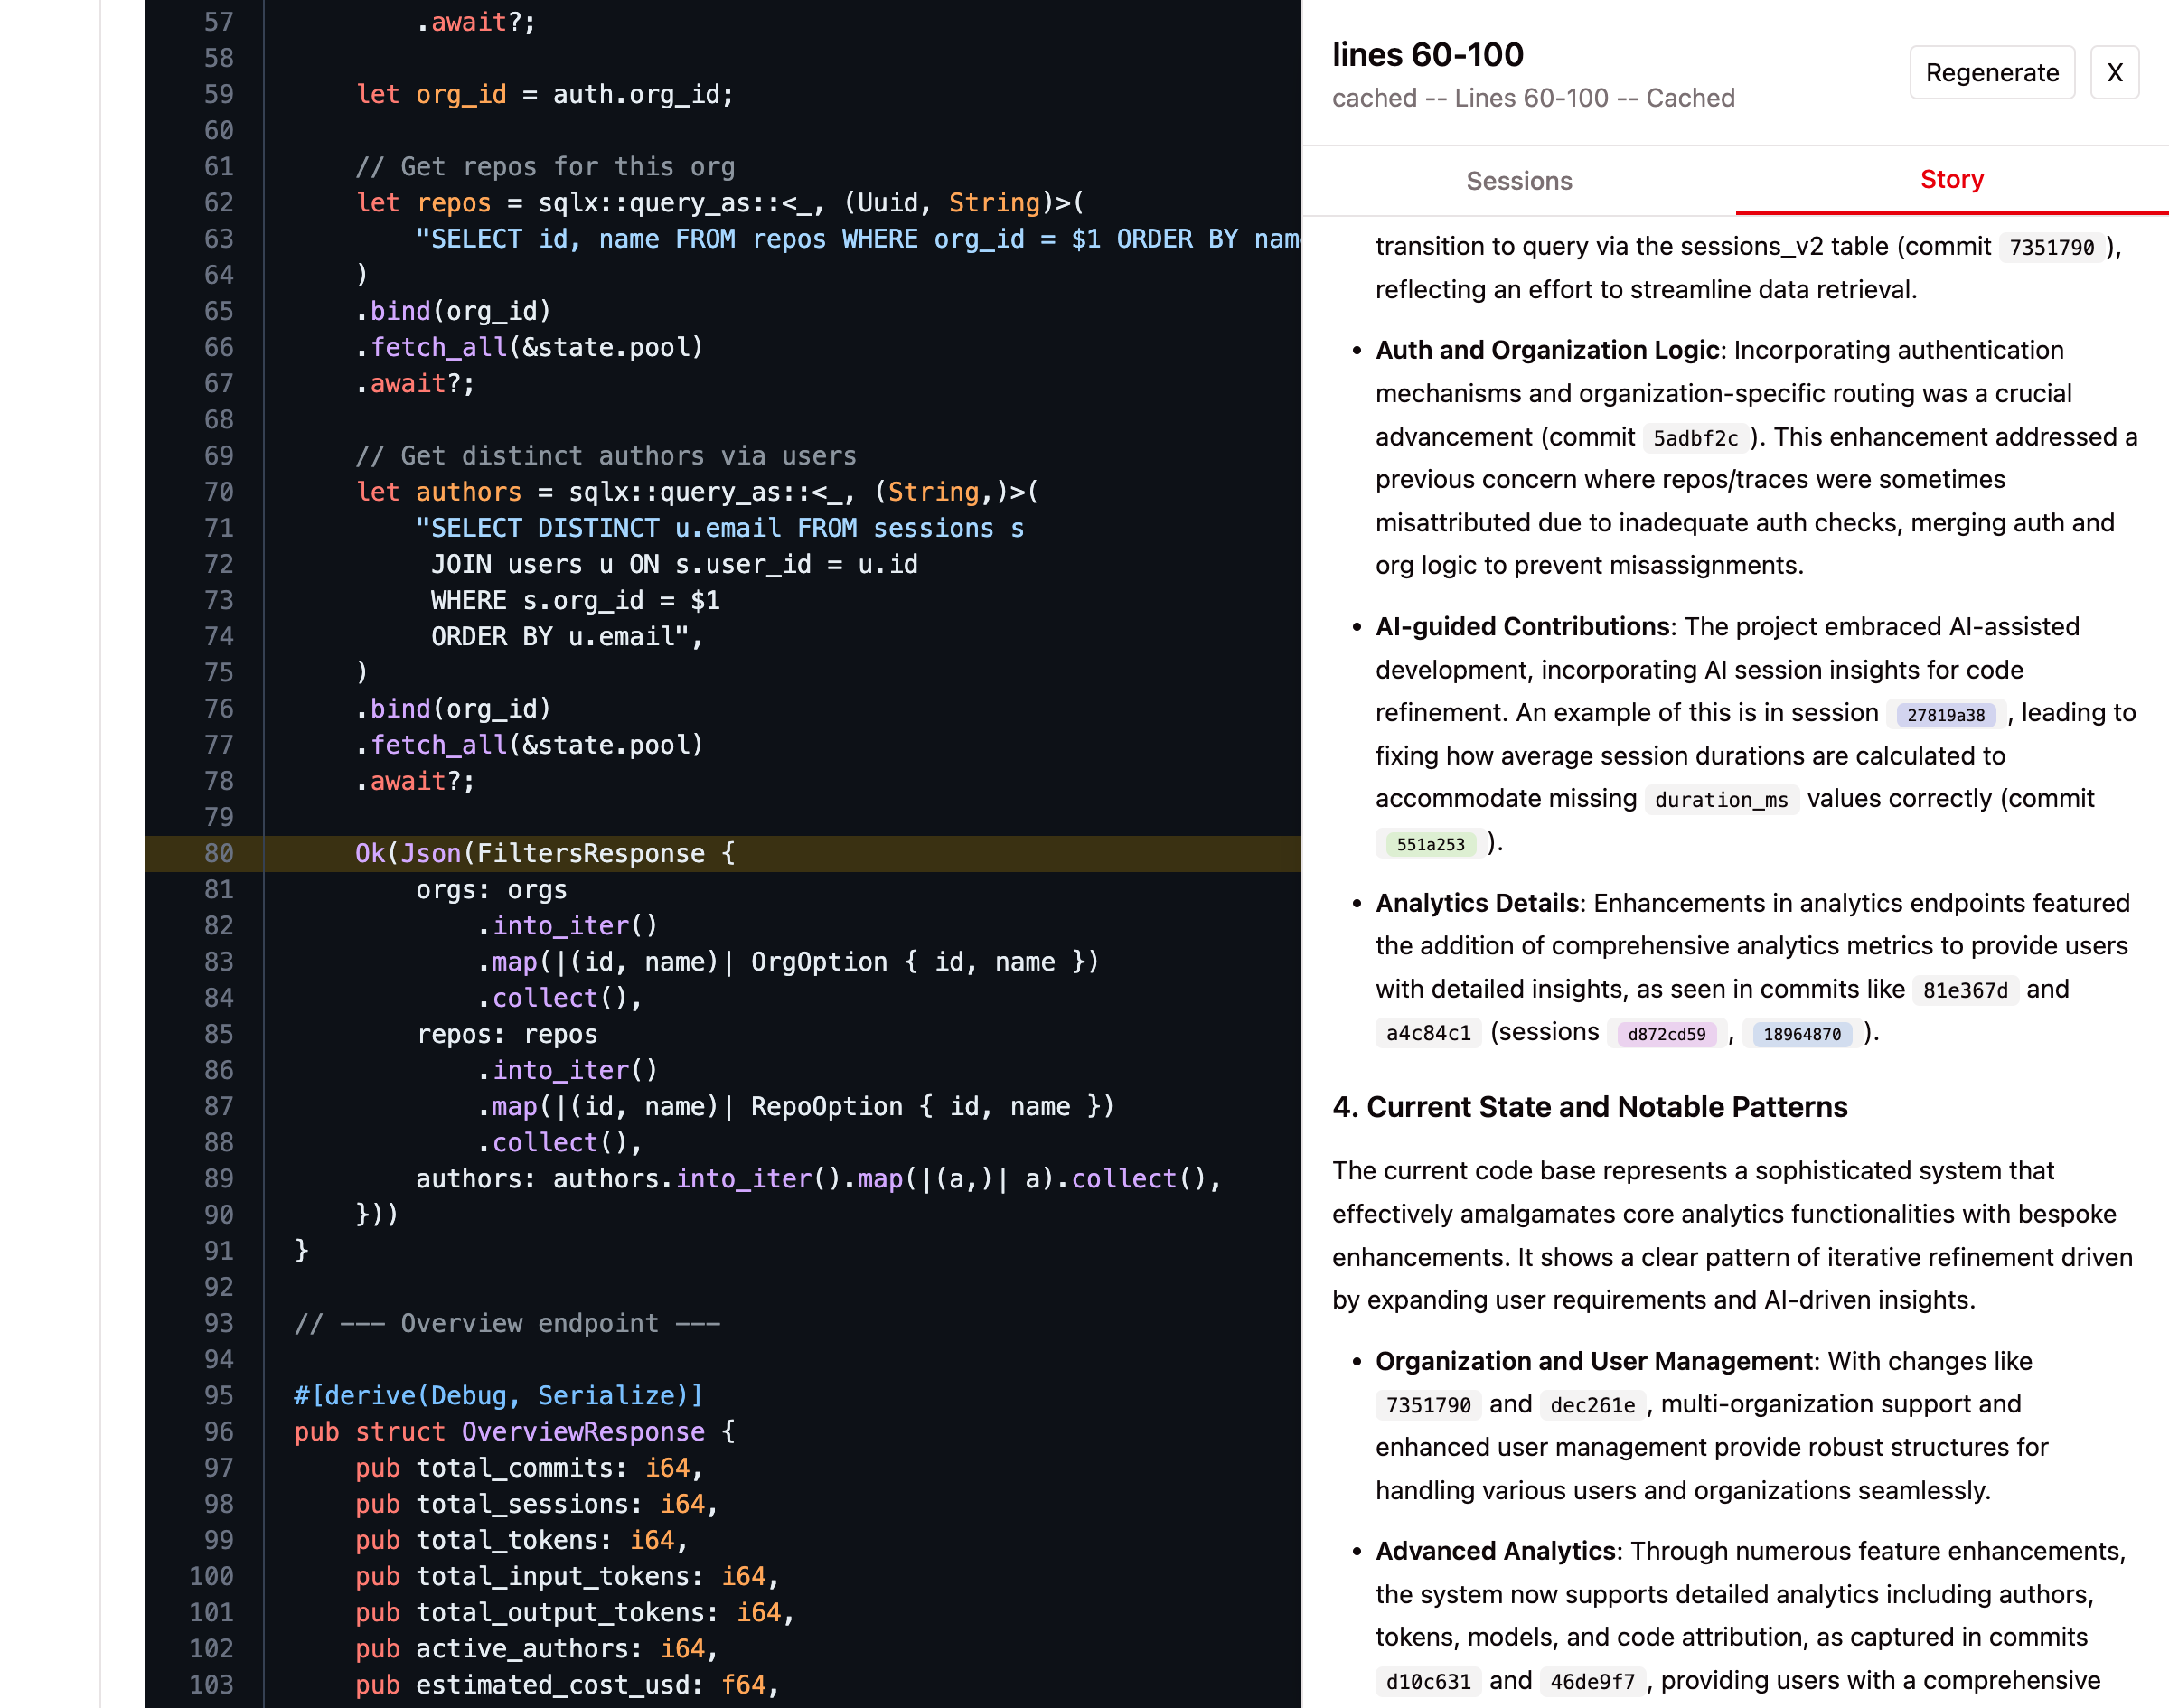
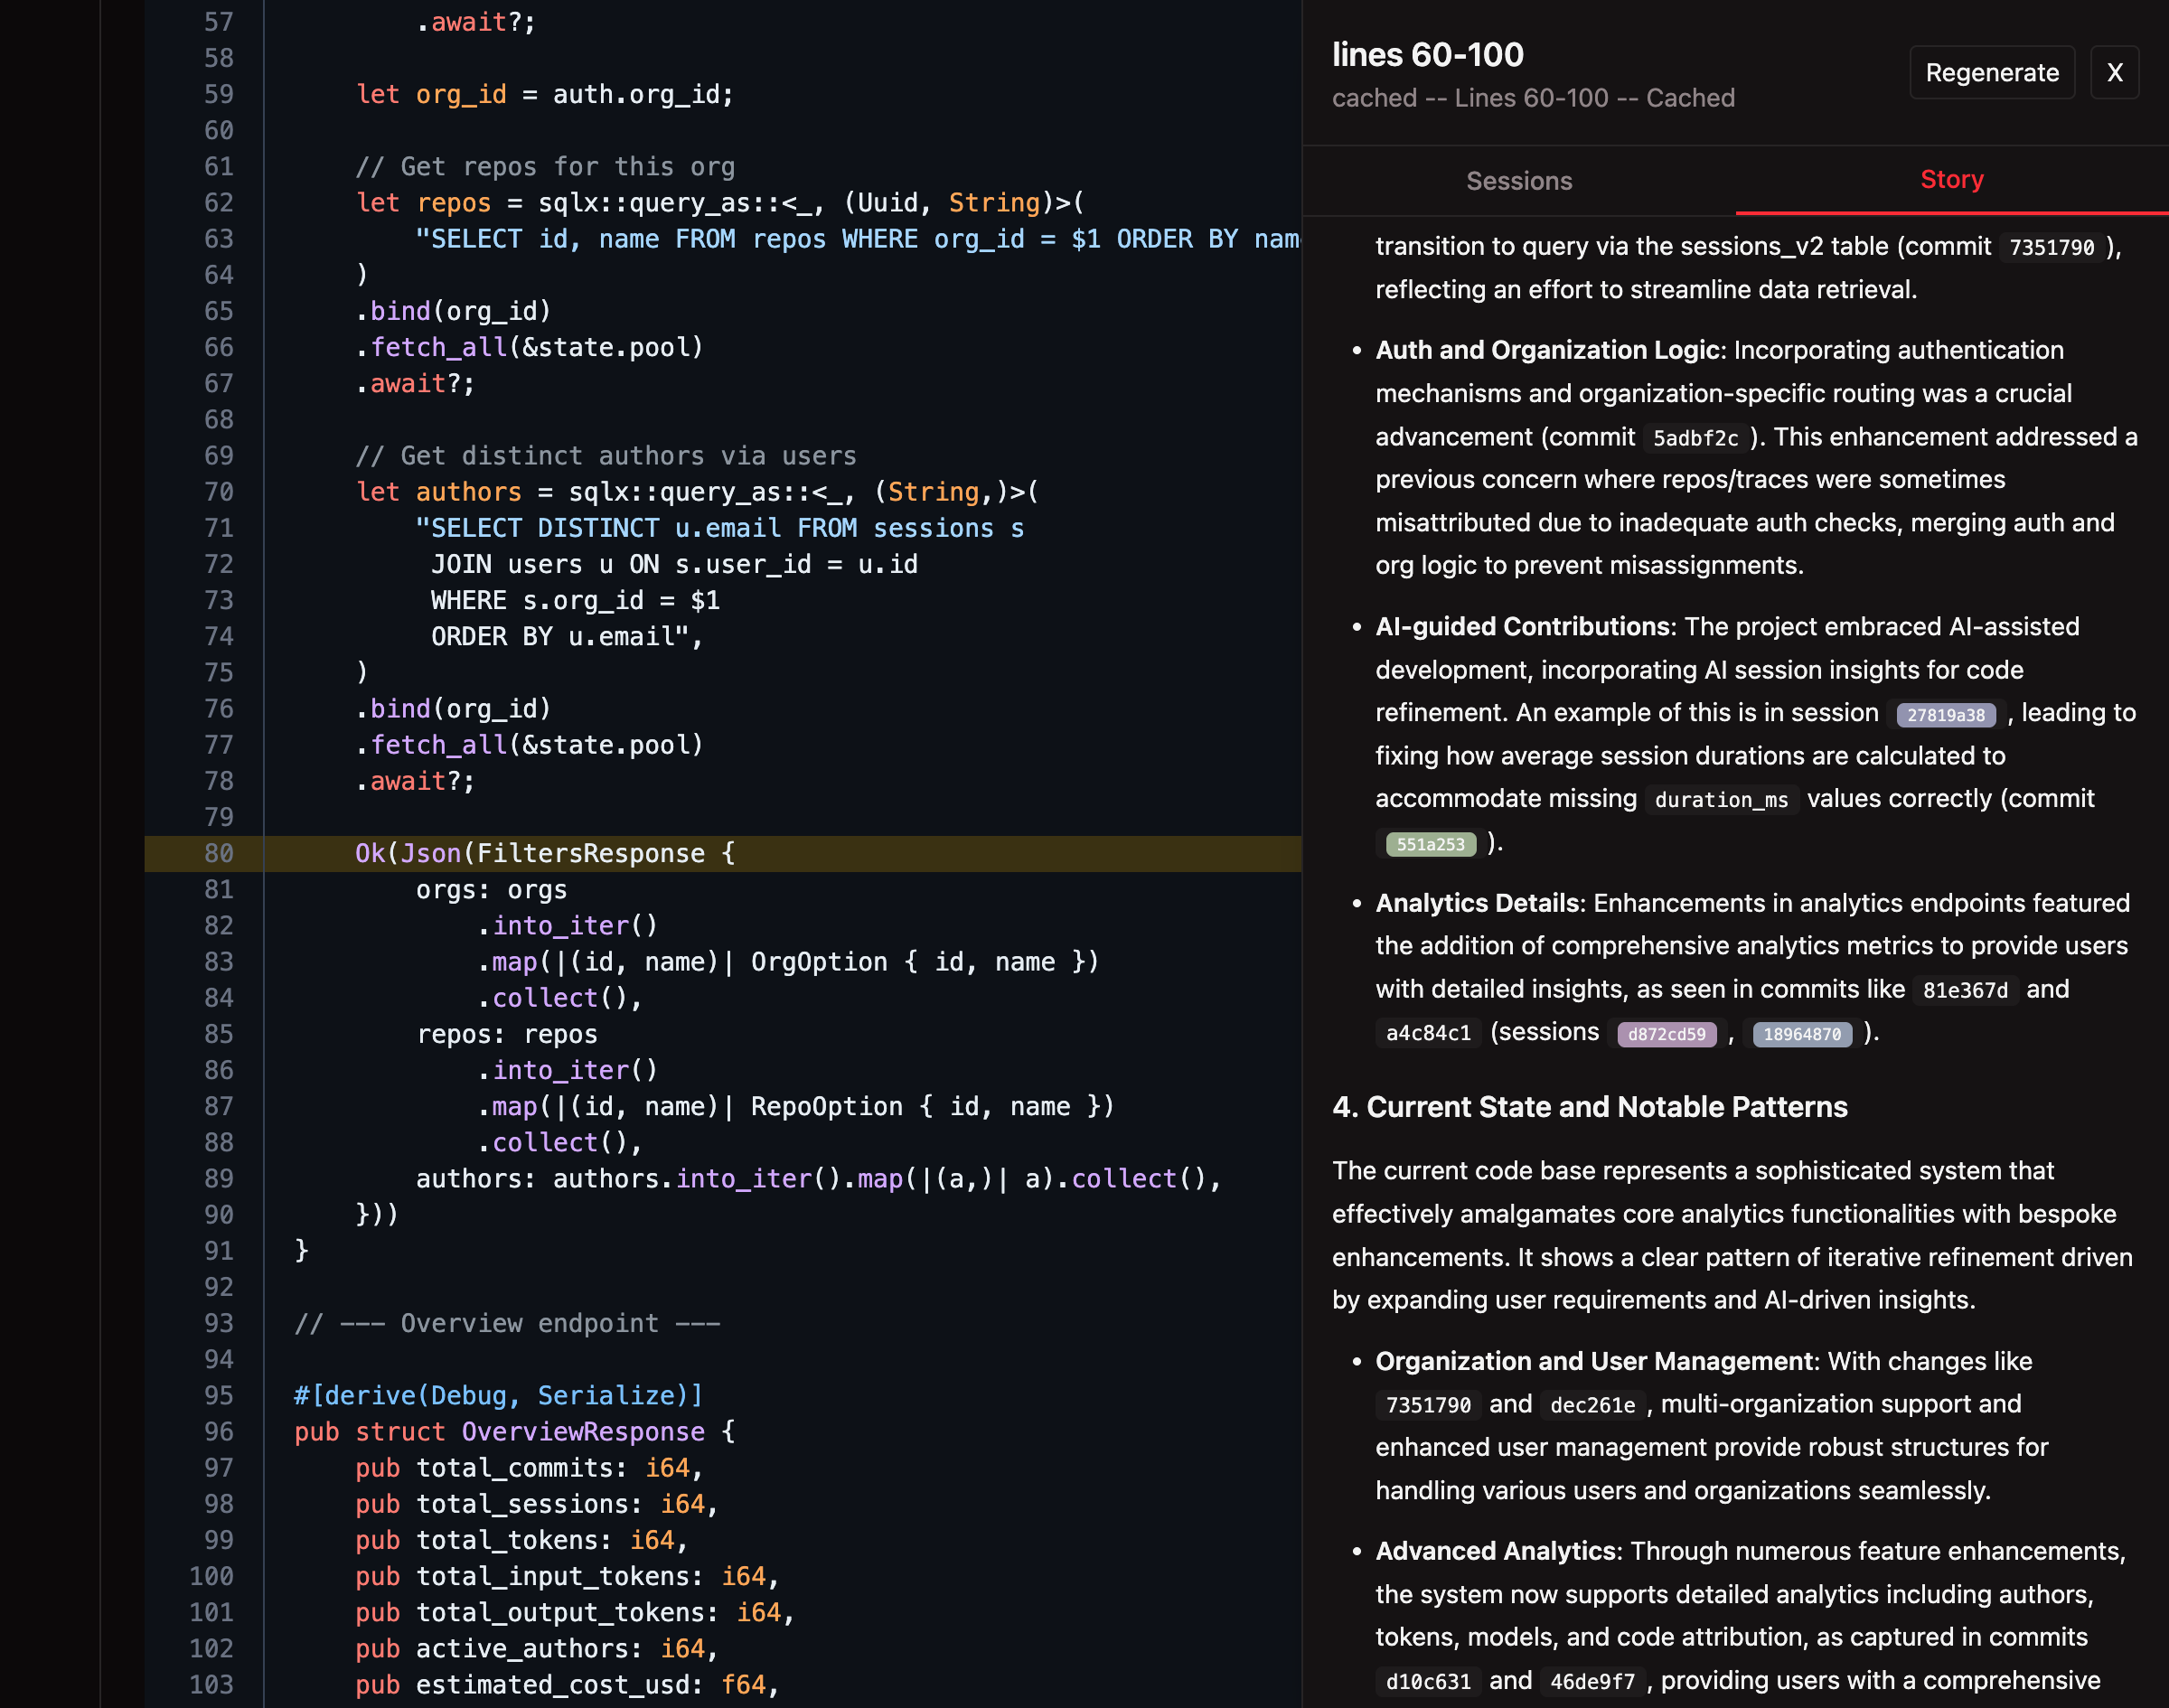
Step 3: Read the Story
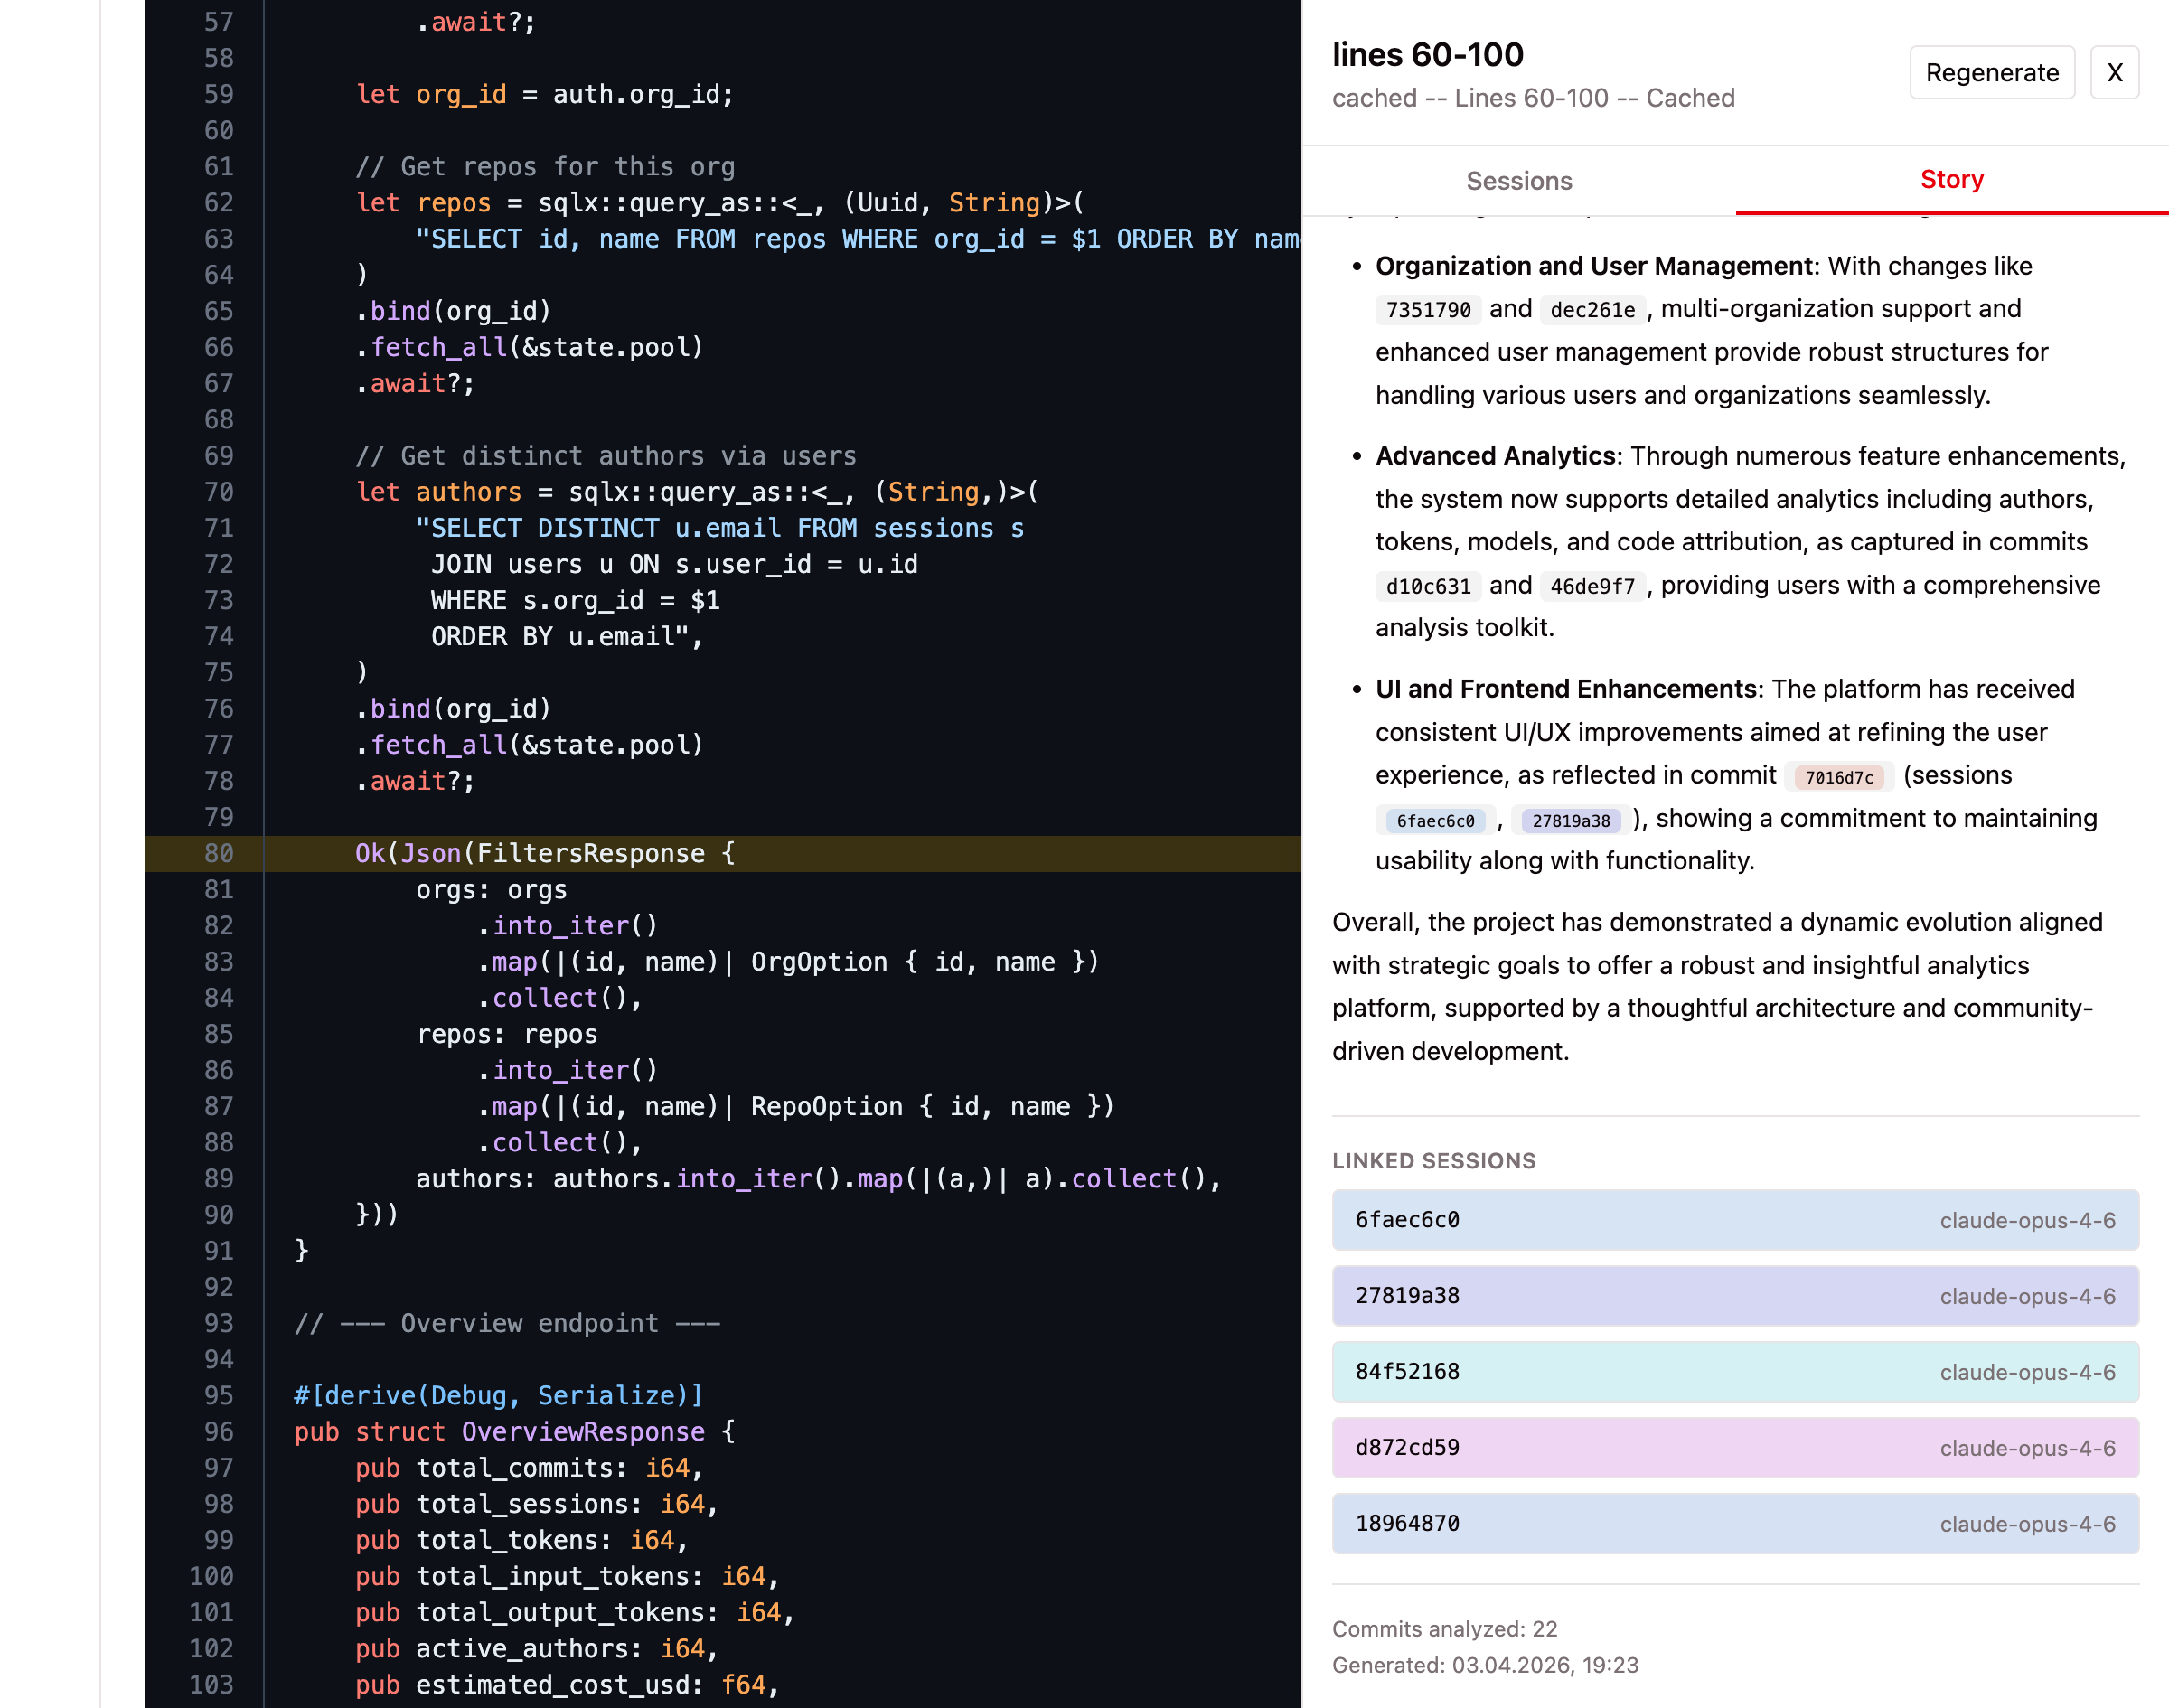
The story panel opens alongside the code, showing:
- Line range — Which lines the story covers (e.g., "lines 1-35")
- Narrative — A markdown-formatted explanation covering the code's purpose, evolution, key decisions, and current patterns
- Commits analyzed — How many commits were examined
- Generation timestamp — When the story was generated
- Regenerate button — Re-generate the story to get a fresh analysis, bypassing the cache
Stories are cached after generation. Clicking the same line again returns the cached version instantly. Use Regenerate to force a fresh analysis.
Step 4: Browse Linked Sessions
The story panel includes a Sessions tab alongside the Story tab. Switch to it to see all AI sessions that contributed to the selected code:
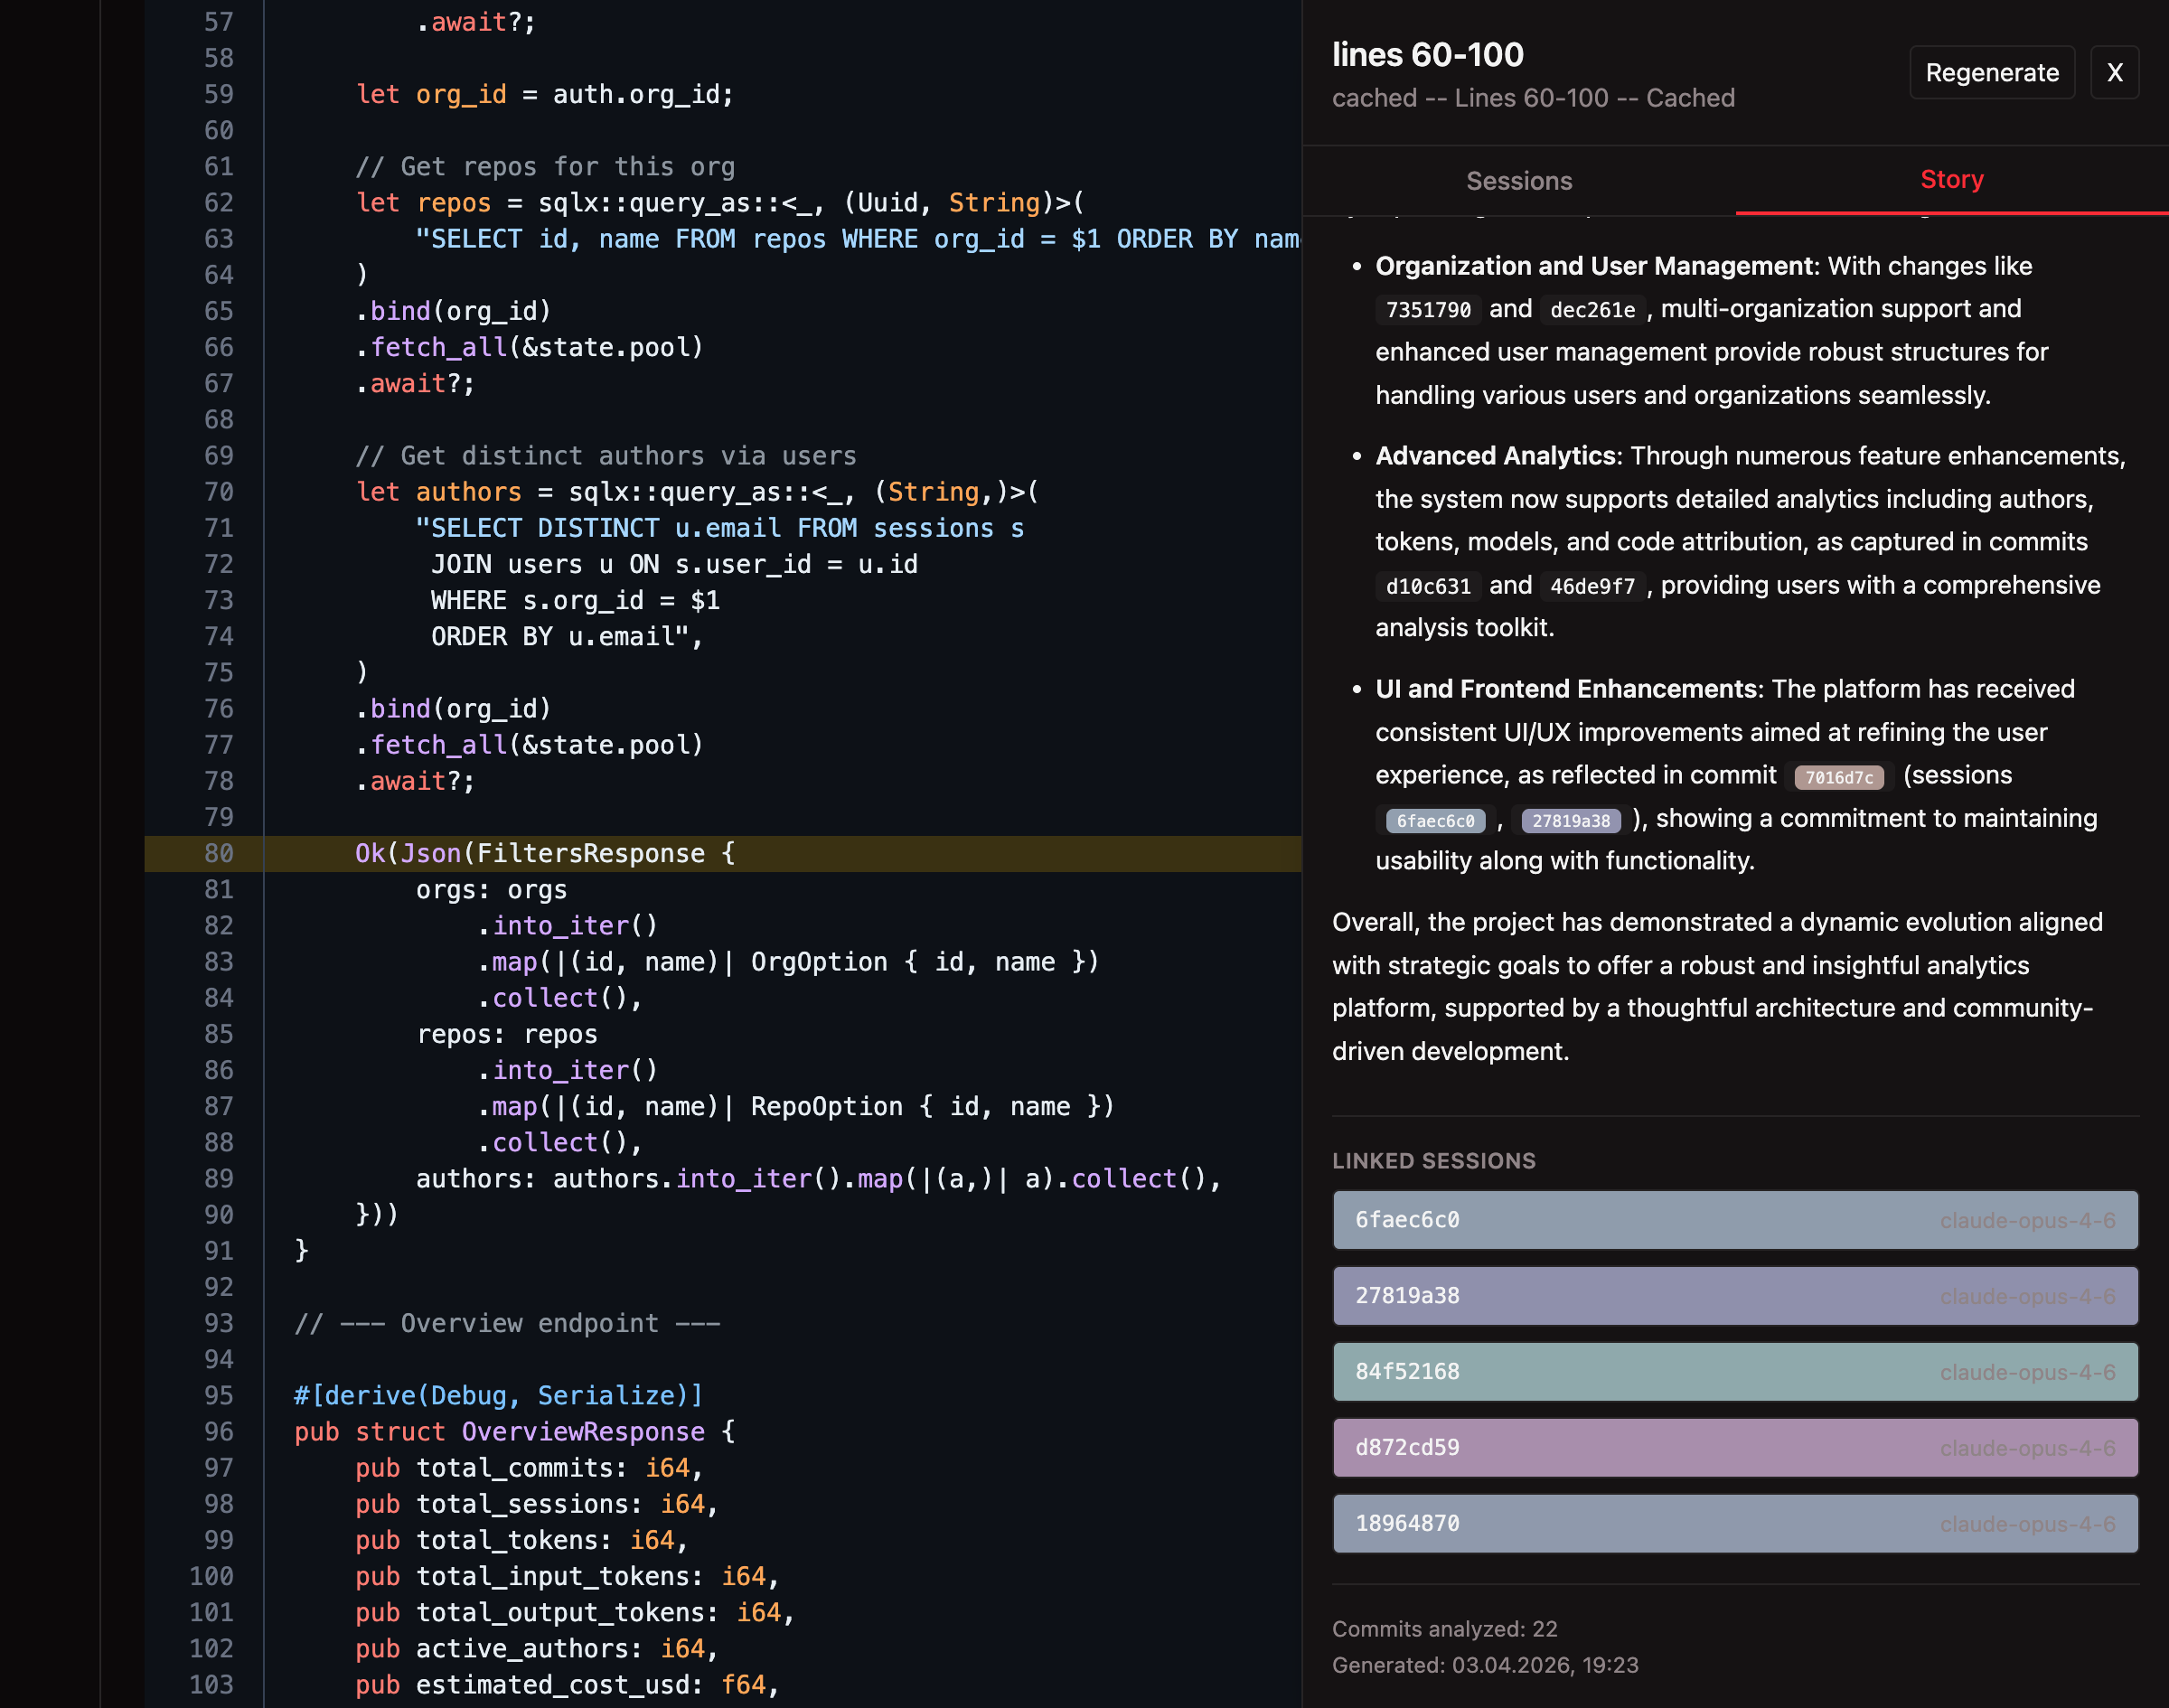
Each session card shows:
- Date — When the session started
- Model — Which AI model was used (e.g., claude-opus-4-6)
- Author — Who ran the session
- Commit SHAs — Which commits this session contributed to
Click any session card to navigate directly to its detail page, where you can review the full transcript, tool calls, file changes, and token usage.
Sessions are fetched fresh each time you open the tab — no caching, always up to date. Unlike the Story tab which requires an LLM call, the Sessions tab is a direct database lookup and loads instantly.
Key Concepts
| Term | Meaning |
|---|---|
| Story | An AI-generated narrative explaining the history and provenance of a specific code function or block. |
| LLM Provider | The AI service (Anthropic or OpenAI) used to generate stories. Configured in Settings > LLM. |
| Cache | Generated stories are cached so repeated clicks return instantly. Use Regenerate to bypass. |
| Line Range | The function or code block boundaries identified by TraceVault for the clicked line. |
| Sessions Tab | Lists all AI sessions that modified the selected code, with clickable links to session details. No LLM required. |